Little Explorers: Paper Making
- blog-1
- Little Explorers

<p>You will need:-</p>
<ul>
<li>Two cheap wooden picture frames, glass removed</li>
<li>Mosquito netting or door mesh</li>
<li>Scraps of paper, torn into small pieces.</li>
<li>A blender</li>
<li>A large casserole or tin dish</li>
<li>Absorbent towels or felt (we found the travel towels made by our sister brand<a href="http://www.lifeventure.com" target="_blank"> Lifeventure </a>were perfect)</li>
</ul>
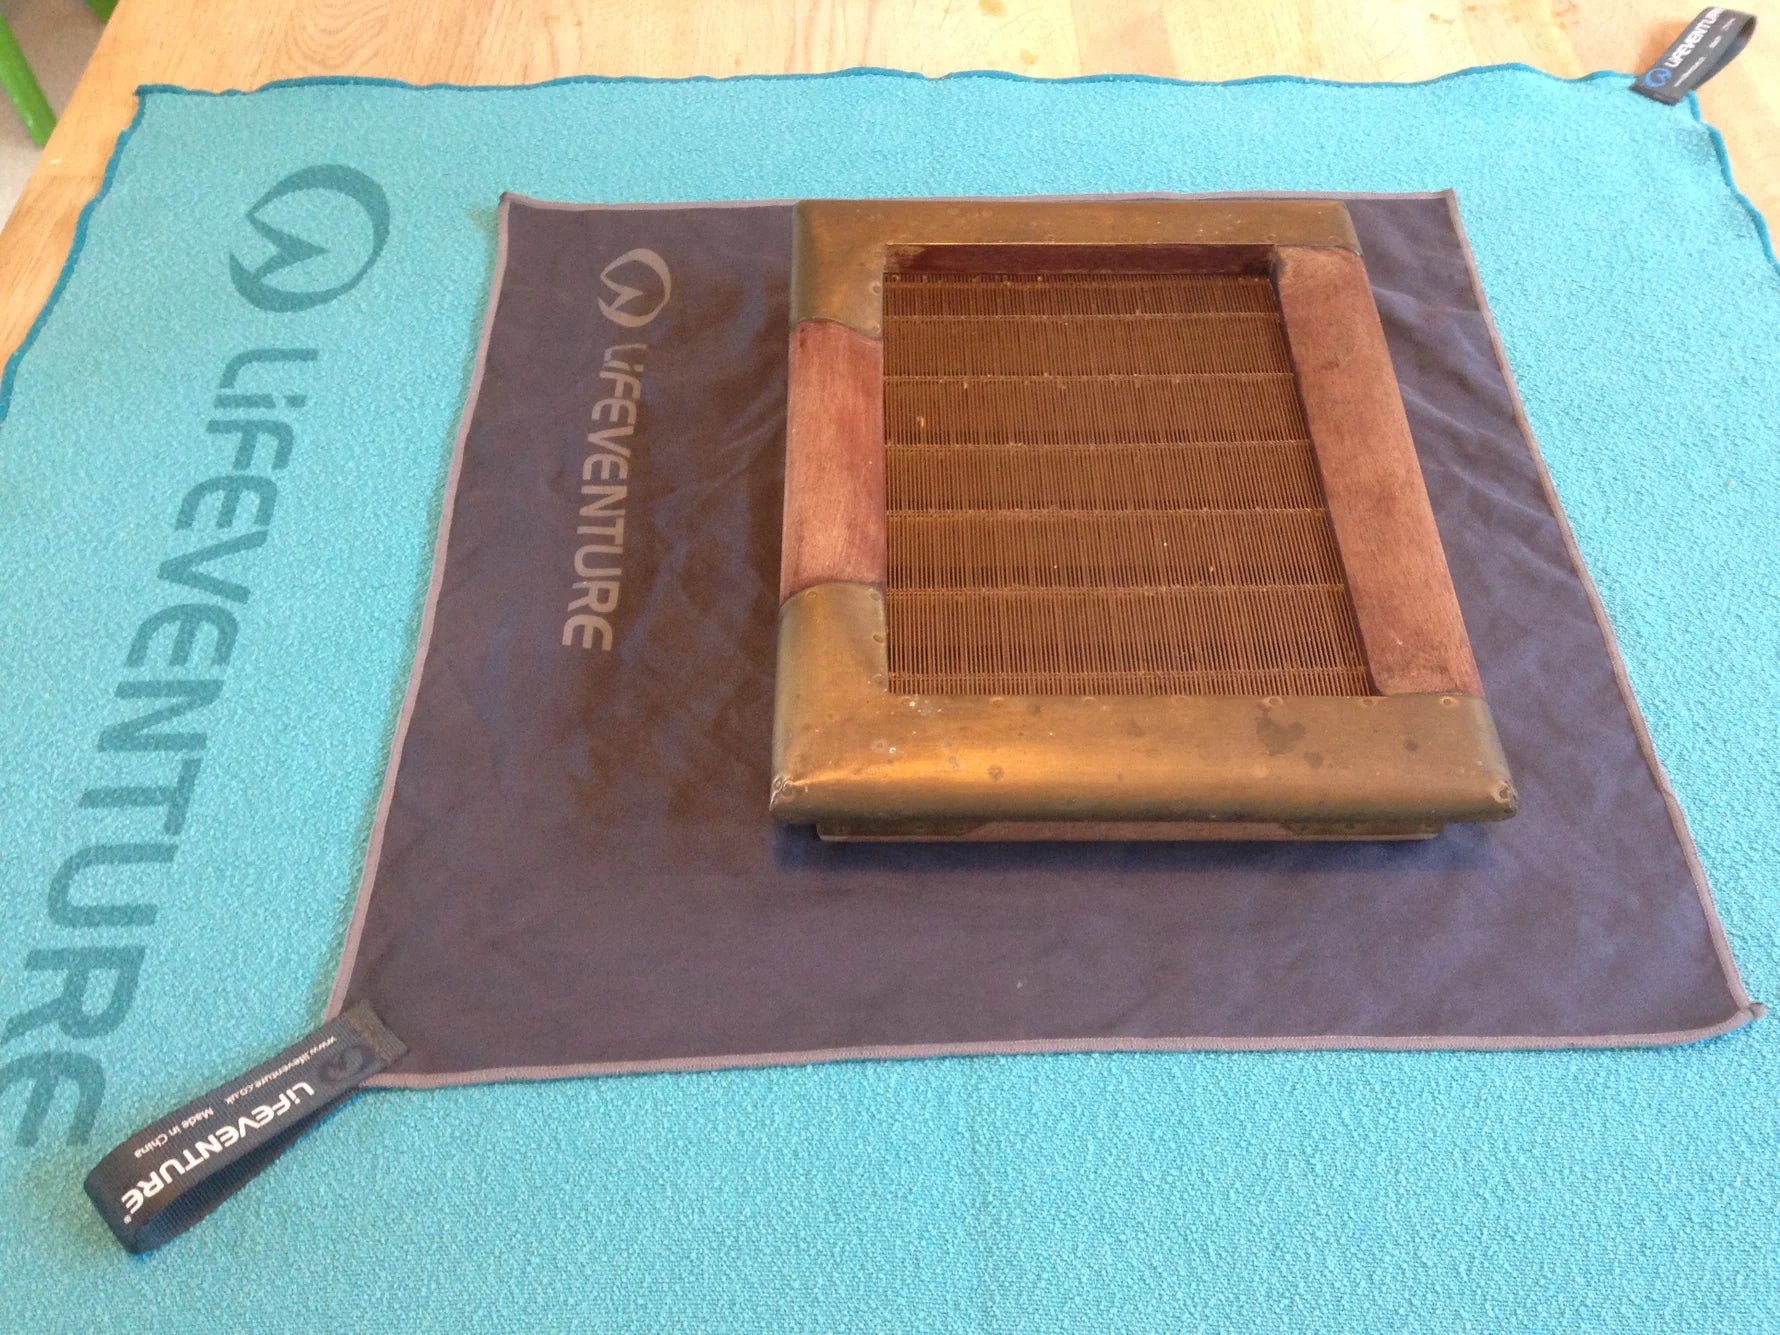
<p>A ‘deckle’ is the frame you need to contain and shape the paper mush. We were lucky enough to be able to borrow a deckle from school, but you can knock one together relatively easily. Take two inexpensive wooden picture frames, and remove the glass. Staple door mesh or strong mosquito netting tightly across the top of one of the frames, and leave the other one empty.</p>
<p><img alt="" style="width: 704px; display: block; margin: auto;" src="/sites/default/files/archive/news_images/photo_(4).JPG"></p>
<p>Next, ask your Little Explorers to get ripping and cutting the scrap paper! This didn’t take much persuasion and in fact kept them occupied for some time. All pre-schoolers enjoy a little destruction and if it involves using safety scissors, so much the better. It’s great for their dexterity.</p>
<p><img alt="" style="width: 1243px; display: block; margin: auto;" src="https://cdn.shopify.com/s/files/1/0675/2796/7002/files/1_Cutting_up.jpg?v=1680144923"></p>
<p>Soak your paper pieces in warm water for 40 minutes, then whizz to a pulp in the blender. When researching this project, we found one bizarre set of instructions which advised throwing the blender away afterwards! Clearly we do not advise this – a good wash in soapy water will be enough to make it clean.</p>
<p>Half-fill your casserole dish with water then ask a Little Explorer to take a couple of handfuls of paper mush and mix it in thoroughly, breaking up any clumps. It should look like very thin, unappetising, porridge.</p>
<p>Layer the empty frame on top of the netted one (so the net is in the middle, not underneath). Here comes the messy bit. Dip this deckle into the watery mess at a 45% angle, scooping up the paper fibres as you go. Shake and knock the deckle to disperse the slurry evenly across the surface, then lift and let the water drain away. This is a very messy process, particularly when managed by a three-year-old, so be warned!</p>
<p><img style="display: block; margin: auto; width: 1254px;" alt="" src="https://cdn.shopify.com/s/files/1/0675/2796/7002/files/Soaking.jpg?v=1680144925"></p>
<p>Once drained, lift off the top frame and you’ll be left with something which is starting to look as if it could be a piece of paper! All the fibres will have started to knit together. Ours turned an interesting shade of dirty green because all the ink from the old artwork on the paper mixed together and dyed it. You could experiment with adding petals or brightly coloured scraps of tracing paper. We sprinkled blades of grass into one of ours, as a nod to paper’s origins. *Expert Explorers, read on below to find out more about this.</p>
<p><img alt="" style="width: 1188px; display: block; margin: auto;" src="https://cdn.shopify.com/s/files/1/0675/2796/7002/files/Squeezing_and_dabbing_out_the_moisture.jpg?v=1680144928"></p>
<p>Drape an absorbent towel over the rectangle of paper and dab firmly with a sponge to remove as much moisture as possible. You’ll eventually be able to peel the edge of the paper gently away from the frame and hey presto! A piece of damp paper. Layer with more pieces of towel or felt and stack under a heavy book to dry it flat.</p>
<p><img alt="" style="width: 766px; display: block; margin: auto;" src="https://cdn.shopify.com/s/files/1/0675/2796/7002/files/Ready_to_dry_out.jpg?v=1680144929"></p>
<p>If you want to write on the paper, you’ll need to add two teaspoons of liquid starch at the mushy porridge stage of the process, and if you prefer your paper to look fresher, white vinegar will help bleach the dyes. Here's our finished products!</p>
<p><img style="display: block; margin: auto; width: 541px;" alt="" src="https://cdn.shopify.com/s/files/1/0675/2796/7002/files/Our_paper.jpg?v=1680144932"></p>
<p>Good luck!</p>
<p>Expert Explorers: Did you know that the first paper was made from strips of the inside stem of a papyrus plant? The strips were laid out side by side, with another layer of papyrus strips laid on top at a right angle. They were then hammered together and dried under a heavy weight. Paper can be made from wood pulp, rice, water plants, cotton and even old clothes! You simply need fibres to ‘knit’ together.</p>


